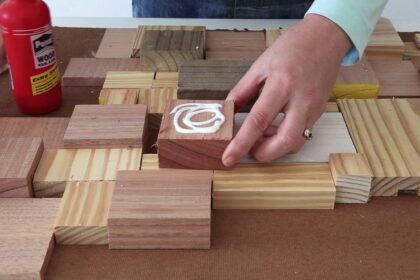
Looking for an idea for a fun art project to do with your child? Here are a few fun ideas: Scratch Art, Match stick sculptures, and Styrofoam printing. Make sure to read through the rest of the article for more ideas. Then, get creative! There are tons of art projects that kids can make using ordinary materials, including paper and Styrofoam! Let your child explore the possibilities and have a blast with their new art projects!
Scratch Art
If you’re looking for ways to entertain kids, try making cool scratch art projects. These arts and crafts are easy to do and can entertain kids for hours. All you need are a few basic supplies and a little bit of creativity. Wooden chopsticks make excellent scratch art tools. Heavy paper will hold up to the scratching and paint. You can also use quality crayons and paint to make scratch art projects look amazing.
Sticky back plastic is the best kind of paper to use for scratch art projects, because it gives you complete artistic freedom. You can use any medium, including crayons, pastels, and paint, as long as it’s smooth and glossy. To make cool scratch art cards, mix two parts paint with one third washing up liquid. Then let the kids use their tools to scratch the paper. Once they’ve completed their project, they can cut out the square and color the edges with different colors.
To make scratch art with crayons, you’ll first need a pencil or pen. Choose a strong contrasting colour. Dark blue, purple, or brown will look great. Then, use a pencil to draw your design on the paper. Scratching the black oil pastel layer will reveal the coloured layer underneath. This technique is great for kids, and it’s also easy to do at home! If you’re looking for cool scratch art projects for your children, check out our list below!
Paper flowers
You can learn how to make paper flowers by using a single sheet of paper and folding it in half. Using a marker, draw an arc on the outer edge of the first petal. Next, fold the remaining two or three layers over the petal you just cut out. Hold them in place while they set. When dry, curl them using a pen and decorate with glitter glue. Here are some tips to make your paper flower cool.
You can even decorate these flowers with glitter glue or spray them with a fine shimmer. The best part is that they look great, especially in groups. And once you are done, you can use them for more than just craft projects. You can also make these as photo backdrops. And you can even save them for later. You can even use them to make decorations for your home. And, they’re not only cool to look at; they won’t fade!
Besides being low maintenance, paper flowers also make beautiful decorations. You can use them to decorate parties and rooms. Or you can even use them to make greeting cards for your loved ones. Try these easy craft ideas to brighten up your day. Remember, prices of paper flowers are subject to change after publish date. By clicking on the links in this article, we earn affiliate commissions. For more information, visit:
Match stick sculptures
You can learn to make match stick sculptures from a variety of sources. One of the most well-known matchstick artists is Pat Acton. He has been making matchstick models for over 40 years. His first project was a 500-matchstick church. For ten years, Acton cut the sulfur tips off matches to make his models. Eventually, he found a company that would supply him with matchsticks.
Bessie, an art teacher, offers a variety of ways to create your own matchstick masterpieces. The tutorial features creative techniques, texture, and beauty that you can create with materials around the home. For example, Bessie uses a straight-razor, glue, file, and toe nail clippers to cut the matchsticks. Bessie also suggests soaking the matchsticks overnight at room temperature to ensure that they stay smooth and even.
To begin, you must prepare your workspace. Make sure you have enough space for your model. You should also prepare the pieces of paperboard for support while they dry. Once the glue dries, you can begin assembling your model. It is helpful to use paperboard to hold the matchsticks while they dry. If you plan to make several matchstick models, you can cut them into smaller sections and glue them together. After this step, you can soak the finished model in water for up to 24 hours.
Styrofoam printing
If you are looking for an easy way to create cool art projects, consider making your own prints on styrofoam. These spongy prints are just as effective as prints made on polystyrene sheets. You’ll find that a high-density foam roller is the best tool to use in this process. It will ensure even application of the paint and prevent the creation of splotchy or bright bits.
To make a styrofoam print, you will need a dry, stiff paint. Avoid using paint that is too runny. The ink needs to be pressed on the styrofoam thinly, but not so thinly that it breaks through the styrofoam. A damp sponge will work well, too.
If you want to make a print with your kids, you can use styrofoam as the canvas. Styrofoam prints are easy to use and can be used for greeting cards, t-shirts, canvas tote bags, and much more! You can also use watercolors, craft paints, or foam paint to create the artwork. To make the project even easier, use white paper for the back of the print.
Paper weaving
You can try paper weaving as a cool art project for kids. To make one, you just need a sheet of paper and a paper fringer. Fold the paper in half and cut along the fold. Next, cut strips of paper so that the bottom and folded edge of the strips overlap. You can also use a ruler and scissors to make the slits. To create the weave, follow the steps below.
You can use a variety of paper and make as many different pieces as you want. You can even make a collage of these pieces! Just make sure to use a colour palette to make your paper weaving look good! If you are not familiar with this technique, you can look up templates in the resource library. You can even use magazines to make paper squares. Just remember that the squares should not be too small.
Start by cutting the strip of paper at the folded edge. Leave about two fingers’ width between cuts. Next, cut another piece of paper and cut it all the way through. You will have eight strips of paper. Take the strips and weave them through the slots of the first piece. Make sure that the first strip weaves under and over the slots on the second one. Once you have the strips cut, you can start weaving.
Oil pastels
If you’re looking for an easy art project for your child, consider using oil pastels. Oil pastels are versatile art materials that allow you to build up layers of color to achieve the desired value and texture. Blending is easy, too! You can use a paper clip or wooden stylus to blend colors, and a cotton swab soaked in baby oil can help smooth oil pastels.
For beginners, try painting with still life. You can use simple objects with a simple lighting arrangement and learn some new techniques. It’s also important to remember that you can’t be successful on your first try; allow yourself time for trial and error. If you’re not a master artist, don’t be afraid to start over a few times until you’ve perfected your techniques.
There are many cool oil pastel art projects that you can create with this versatile art medium. You can also use it to create Halloween crafts such as haunted houses! A purple haunted house is a great way to use this fun medium, and there are more Halloween-themed art ideas available here. The possibilities are endless! So, get messy! Here are a few cool art projects for kids to enjoy!
Wooden egg cartons
When it comes to creative craft ideas, egg cartons are a great source of materials. Not only are they inexpensive, but they can be used for a variety of fun projects. For instance, one project involves making a mini groundhog and his den, which you can display on your mantel. A different project involves making a cute egg carton flower print that you can use as a springtime card or gift.
For a fun way to decorate the egg cartons, cut them into sections of six or two cups. Then, paint the outside and add mouths and eyes. You can also use a marker pen to add a face and mouth to your creations. After the paint dries, you can add decorations to complete the look. You can also paint a small part of the carton, like the eye.
This craft is an excellent way to teach children how to use paint and brushes. If you don’t have any supplies, you can always purchase them. In addition to craft ideas, egg cartons are also great for crafting fun. You can paint them into a cute animal or make a rooster or flower. Some websites even have instructions for making these items in foreign languages. A few other fun ideas for using egg cartons are described below.